Asset Options
/https://siu.edu/search-results.php
Last Updated: Nov 08, 2024, 11:45 AM
Making Changes to Assets
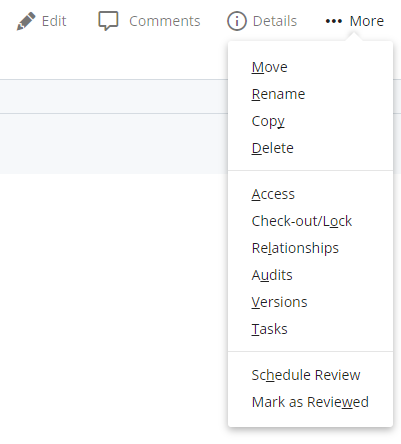
Once created, assets can be edited in several different ways. When previewing an asset in Cascade, a tabbed menu will appear above the preview of the page. Additionally, clicking the small arrow that appears upon rollover of the asset will display the same options.

- Edit
- Copy
- Delete
- Move/Rename
- Relationships
- Replacing an Asset
- Versions
- Publishing
- Reordering the Navigation
Edit
- In the Site Content, locate and click on the asset you would like to edit.
- Once the asset has loaded, click on the Edit button located above the preview.
- From here you are able to edit all the content of an asset. Make the desired changes to the asset. While you are editing an asset (page, file, or folder) it is automatically locked to prevent other users from accessing the same asset while it is being edited. When edits have been made and the asset has been submitted, the asset is automatically unlocked so that other users can access it.
Copy
All assets can be copied. This is used when a page has blocks or features added to it that you want to appear on a new page. Copy the page, place it anywhere in the site, and edit the content. All of the content, blocks, photos, etc. that appeared on the original page will be copied.
Delete
You can delete any asset. When deleting, you must also click the Un-publish Content checkbox so that the asset is deleted from the web server. The DELETE area will display a list of all pages within your site that are linking to that asset.
Move/Rename
Moving an asset and changing the system name are performed by the same function in Cascade. If an asset that appears in the navigation is moved, make sure to publish the affected folders, or even the entire base folder. Note: any time a file is moved or renamed, it will have to be re-published to the server.
To move a file:
- Click the file you wish to move or rename
- Click “Move/Rename”
- Change the system name and/or the new location for the file
- Submit your changes
- Publish out any affected folders or the entire base folder
Relationships
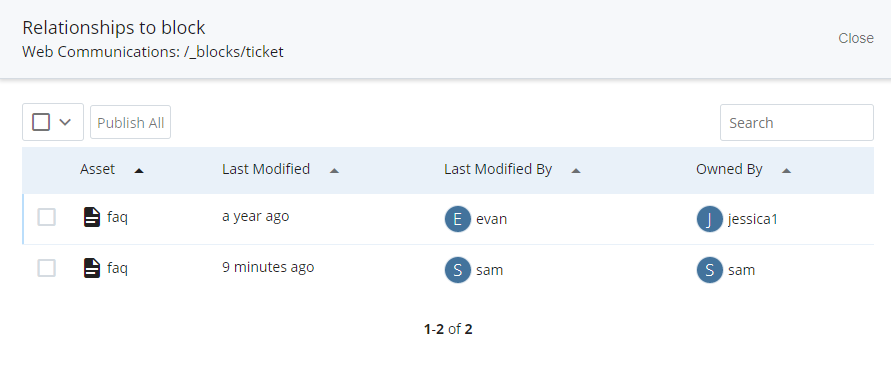
The Relationships tab shows everywhere a particular page, file, or block appears on your site. This is particularly useful when considering deleting an asset. Before deleting an asset, be sure to check the asset's relationships to ensure the asset is not unknowingly removed from another page, or a link is not broken.

Replacing an Asset
Your PDF files and other documents might be updated on a regular basis. Rather than uploading a new document, you have the option to override the document you want to replace. The same is true with images, and other types of documents.
- Navigate to the document you want to replace (probably in _common/documentsFOLDER).
- Click the file for the document to preview it and click EDIT.
- Click CHOOSE to browse to the new file on your computer.
- Click SUBMIT.
- PUBLISH the new file.
Versions
Cascade maintains a full version history on each asset in the system. As changes are made to any asset in the system, Cascade keeps track of the changes in separate copies of the asset called versions. There is a list of versions for each asset, which shows the author for each change, the original creator of the asset, as well as the time and date of the change and any notes available. Users may navigate through the various versions, compare them with the current version, and even revert an asset back to a previous version. Unlike the Recycle Bin, versions are not deleted from Cascade.
Publishing
For an asset to appear live on the Web it MUST be published first. Publishing to a web server is available for pages, files, folder, image, and documents. Blocks cannot be published. Instead, the pages with relationships to those blocks should be published. To do this click on the “Relationships” of the block and then click “Publish all relationships” link.
To publish one asset:
- Navigate to the asset.
- Click the PUBLISH button.
- Leave all checked items checked.
- Click SUBMIT to publish your content to the selected destinations.
To publish an entire folder of assets:
- Navigate to the folder (click the “>” icon when mousing over a folder).
- Click the PUBLISH tab.
- Leave all checked items checked.
- Click SUBMIT to publish your content to the selected destinations.
To publish an entire site (This will slow Cascade down. Please be courteous to other and try not to do this before 4:30 pm):
- Navigate to the BASE FOLDER.
- Click the PUBLISH tab.
- Leave all checked items checked.
- Click SUBMIT to publish your content to the selected destinations.
To unpublish assets (remove assets from the server):
- Navigate to the asset.
- Click the PUBLISH tab.
- In Options, change Publish Mode radio button to Un-Publish.
- Click SUBMIT to publish your content to the selected destinations.
Reordering the Navigation
The order of the links in the navigation can be changed.
In the Site Content click the top folder. It should share the same name as your site.
Click the Order column heading to display the site folders and files in order. Either click and drag the files or folders to change the order, or use the blue up and down arrows on the right.
To reorder items within a folder, click the folder name in the Site Content and reorder them in the same way.